Monday, October 29, 2012

So long, farewell. . .

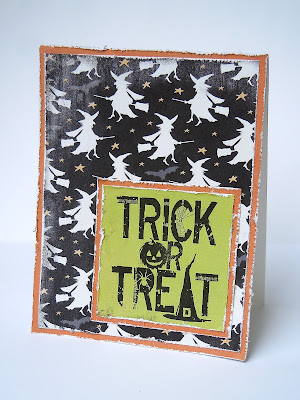
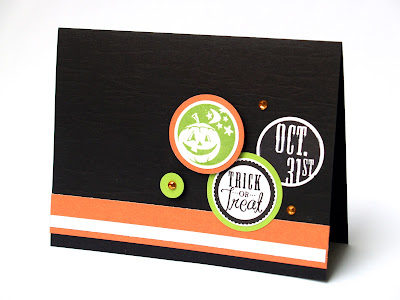
It's the end of an era in my papercrafting life . . . I've been on the fabulous team at the Card Positioning Systems blog since February of 2008, and it has been SUCH a privilege to work with some of the most fabulous cardmakers out there!  I'm super sad to say that the end of October brings the end of the CPS blog.  It's time for all of us to move on, and I am so thankful to Tami Mayberry for inviting me to join the team!  These are my last two cards for the CPS blog, both featuring papers from The Paper Loft, our October sponsor.  There's still time to get in your last minute cards so be sure to chose a sketch, or two, or three, that was featured this month and create some final CPS cards with us! 

card by Laura Williams featuring The Paper Loft

card by Laura Williams featuring The Paper Loft
Oh. . .and one more thing. . . 
HAPPY HALLOWEEN!!!!

The family and I are celebrating in the mountains, with my family and I am so excited to sit in a pile of fall leaves, roast marshmallows on the fire pit, and wear a SWEATER for crying out loud!!! It will be PAINFUL to roll on home to the Florida heat next week! Thanks so much for stopping by! Check back in soon, because there's lots going on in November!
xoxo

Saturday, October 27, 2012

The Thankful Tree


The following tutorial was created for the Discount Cardstock blog.  Please be sure to visit the blog to see the current sales and promotions!

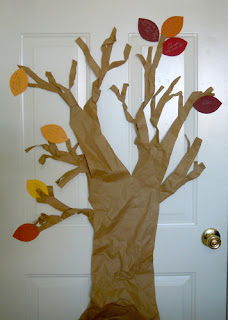
A thankful tree is a tradition we have done each year with our family.  We hang a paper tree, and write things we are thankful for on the leaves each day, hanging them up to fill our tree with colorful fall leaves.  We usually keep it up until Thanksgiving, or until we get out our winter decorations.  As our children have grown, it's always cute to see what they are thankful for.  This year my three-year-old is thankful for the garbage truck. And my seven-year-old wrote his best friend's name. (So sweet!) I always keep a few of the leaves from each year to add to our scrapbook.

1. Hand cut a tree shape from a roll of kraft postal wrapping paper. You can find it online or at most WalMart or Target stores. 
thankful tree project by laura williams, www.lauralooloo.blogspot.com


2. Crinkle and fold branches as desired, and tape tree to wall or door.  We always hang ours on the door that goes out to our garage, because it can handle lots of tape stuck all over it! 

3. Trim leaf shapes from autumn-colored cardstocks.  I folded a scrap in half to make a leaf shape and used it as a template for the rest of them. If you have a diecutting machine, a leaf die would be perfect too.

4. Leave a jar of leaves, pencils, and tape near the tree so that family members and friends can fill up the tree through autumn.


thankful tree by laura williams, www.lauralooloo.blogspot.comthankful tree by laura williams, www.lauralooloo.blogspot.com


Thursday, October 25, 2012

Ohhh Carol G!

Carol G. . . .I need to hear from you to get you the coupons you won!  I emailed you, but if it went to your spam and you haven't seen it - please check your spam, and email me your addy! If I haven't heard from you by tomorrow, I will choose another winner!

And I would hate to post without a card. . . .let's see what I can dig up. . . .


How about this? (I hope I didn't already post this.) Close To My Heart papers. . .Close To My Heart stamp.  I think this was a CPS sketch, but quite frankly, i am suuposed to be out the door to pick up my son in 3.2 minutes. To be exact.
So I have no time to check.
On anything.
So humor me. Click the CTMH link in the sidebar if you are desperate for some fabulous CTMH goodness from my dear sweet mama. She's my dealer of all things CTMH and beautiful! xoxo

Tuesday, October 23, 2012

Cardstock Crafts for Kids: part 1


The following tutorial is featured on the Discount Cardstock blog today! It is part of a three part series that I hope you'll enjoy!  (Be sure to stop by the blog for promo codes and sales going on!)

Thanksgiving Lacing Cards
By Laura Williams
DCS Designer
As a mom, I’m always looking for quiet activities to occupy my children in doctors offices, on airplanes, and at church. Today I’d like to share one of three simple paper projects to create for kids. No fancy tools or supplies are needed – seriously, you can complete all three of them in a day.
My other 2 upcoming cardstock projects for kids:
    • Project 2: Paper Beads – October 30th, 2012
    • Project 3: Mini Coloring Book – November 6th, 2012

1. Lacing cards are a perfect activity for a toddler or preschooler with busy hands. To create this Thanksgiving lacing card, I started with a fabulous turkey printable coloring sheet, at www.coloringpages7.com. Some of my favorite simple coloring sheets, with many themes and seasons, can be found atwww.easycoloring.com, and www.twistynoodle.com.

2. I printed my turkey on 4 colors of card stock. Some printers handle thick paper better than others – if yours doesn’t cooperate, you could print it on paper and photocopy onto cardstock. Or create your own simple shape without a coloring page.


3. Next I paper-pieced the turkey. If you are new to paper-piecing, it basically means that you cut out different sections of your image from different colors, and assemble it together. This is one of my favorite techniques when using stamps, but cutting out this large simple turkey and putting it together was even more fun than I expected!


4. Adhere the layers together, and then punch holes using a hole punch. Cut a length of yard and let your little person lace away!

5. A few notes:
a.) I’m thinking about laminating this lacing card before I hand it over to my 3-year-old. I’ll just have to go back and punch the holes one more time.
b.) I purposefully left that little space between the turkey’s feet uncut. I’m pretty sure that poor Tom turkey would be legless within 3 minutes of that certain 3-year-old handling it! (Think about your image before you start – choose something easy to cut, and that will lend itself to lacing the edges.)
c.) Wrap tape around the end of the yarn to make it easier for little hands to manage.

Saturday, October 20, 2012

New from The {Stamps} of Life!

New goodies from TSOL!!! This frame set coordinates with Sizzix dies, which makes life SO easy! No trimming necessary! (Although I've trimmed them and they aren't bad to cut by hand, if you don't have a diecutting machine!)

This first project is a fun little treat bag.  Can I tell you how happy I was that I had Easter grass in yellow and orange!? I LOVE it when something can function for more than one holiday! The little bag and twine are from Whisker Graphics.  There are tons of sentiments which fit into these fabulous little frames that Stephanie created! They are oh-so-versatile!

I used lots of dies on this card, and two of the frame stamps.  The pop of pink makes me happy!! 

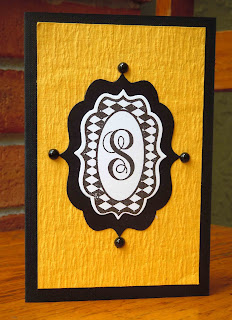
I ADORE this crepe cardstock from Discount Cardstock.  The texture is just gorgeous, but it has the weight of cardstock, rather than thin crepe paper!  Love the big monogram (the S is in honor of our fabulous STEPHANIE from The Stamps of Life!)

Be sure to head over to the TSOL store to scoop up these new stamps, plus ink, dies, and anything else you need!!! 

Thanks so much for stopping by!
xoxo


Friday, October 19, 2012

my soapy soapbox (and free stuff!)


From time to time I get off of my crafty soap box to climb up on top of a LITERAL (well, almost literal) soap box.  I have the fun "job" of being a Purex Insider, which means I get the inside scoop as well as new product to try from Purex and other companies that Purex helps to promote.  And usually they send along an extra little goodie or two for me to share with others.  (And that's good news for YOU, right!?)

I have tried two new products recently that I'd like to mention.  The first is a new Soft Scrub All Purpose Cleaner.  At first glance, it looks like many other household cleaners but this cleaner has a few cool features.  First, you can spray it upside down! It's perfect for cleaning toilets because you can REALLY clean in there!  The second snazzy feature is the trigger. It allows you to spray with a fine mist OR a thick foam with a simple flip of a tab.  I'll admit, I don't love the scent - but I do love how this product cleans.

The second product is a NEW Purex laundry detergent. Even before joining the Purex Insiders, I was a pretty faithful Purex user.  It's frequently on sale, it's one of the less expensive detergents to begin with, and it cleans REALLY well.  My favorite variety is Purex with Zout.  Zout is my favorite pretreating spray, so I was excited when the two products teamed up.  Purex with Zout works as a pretreater AND a detergent. And it REALLY works. . . .my two boys are FILTHY, and it almost always cleans whatever they've spilled!  This NEW variety, Purex Plus Oxi boasts both Zout AND Oxi!  The flyer I received claims that it works against over 101 different stains - and I'm pretty sure that my family will work to prove that very claim!

Purex with Oxi laundry detergent


So here's the cool part for you - I have coupons to give away! I have a coupon for a completely FREE bottle of Purex Plus Oxi and a completely FREE bottle of Soft Scrub.  In addition,  Purex is giving away $6,000 in prizes on their website, plus free detergent for a year. And if you enter to win through my specific link, I get the chance to win a prize too! (So will you? Pretty please!!??)   The sweepstakes ends on November 30th - so enter EVERY DAY until then, for many chances to win!

Thanks so much for humoring my laundry posts amongst the usual papercrafting chatter!!! Have a super day!!!! :)


a Rafflecopter giveaway

Thursday, October 18, 2012

Sparkly Snowflake Garland tutorial


The following is a tutorial created for A Cherry On Top. They have lots of sales going on EVERY day, and they get new product in ALL the time!!!! Please visit them to do some shopping for all your paper crafting wants! :)

Maya Road's new chipboard snowflakes are the perfect base for holiday projects.  Today I'd like to share a sparkly snowflake garland that I created to hang in my dining room.
snowflake garland tutorial by laura williams, for acherryontop.com
You're going to love this supply list, because you may just have almost everything you need, already in your stash.  There are tons of ways to alter this project to suit your taste, and color scheme.  I stuck to an iredescent white and silver color scheme.  But this would be gorgeous in any metallic color - or maybe even an icy blue!  So I'll share some of the items I used, and I'll also share some suggestions that you might want to try.  
Supplies:
Maya Road large chipboard snowflakes - This goes without saying.  It's the only thing you really *need* to get this project started!
Paint - any kind of craft acrylic paint (or even spray paint for that matter) will work.  This Pearl Metallic Acrylic by Adirondack would be fabulous. 
Glitter and Glam - I used Stickles to coat my snowflakes after painting them, and then added a shake (or two or ten) of actual glitter on top.  Use whatever glittery goodness you like!  I added some details withGlitter Dots by Mark Richards.
For a little extra character, I strung Crystal 8mm round beads by Jolee,  between my snowflakes, 
You'll also need a hot glue gun and some string, twine, or wire - whatever you'd like your garland to hang from.

Alright, let's get started!  In the package of chipboard, you'll find matching larger and smaller snowflakes.  Match them up, layer them together, and adhere with adhesive. In this picture, you can see the already sandwiched pairs at the top left, and the final pair to be adhered, in the bottom right.
Next, paint the snowflakes.  I only painted the front side, because the back side of my garland will be hidden. 
snowflake tutorial by laura williams, acherryontop.com

After the paint  dried, I squirted some Stickles onto each snowflake and spread it around with a small paint brush.  Before it dried, I shook some sparkly glitter all over it. (And yes, my entire house is coated in glitter now. It's very . . . festive.)  I'm thinking some of this amazing Sparkle Mod Podge over the entire top would have been a great final step to seal it all in.
snowflake garland tutorial, by laura williams, for acherryontop.com
Next step. . .wait for everything to dry. Completely. Then flip over your snowflakes, and spread them out.  This first image shows how I threaded some beads on, in between each snowflake, and the way I "blobbed" some hot glue on the back of each to adhere white string.
snowflake garland tutorial, by laura williams, for acherryontop.com
I used a Tsquare and decided that I wanted my snowflakes to be 6 inches apart.  So as I glued, I simply measured 6 inches from the center of one snowflake to the next, (making sure the beads were in between!)
snowflake garland tutorial, by laura williams, for acherryontop.com

And here is the finished product! It's perfect hanging from my china cabinet:

snowflake garland tutorial, by laura williams, for acherryontop.com

snowflake garland tutorial, by laura williams for acherryontop.com
Now, I'd like to share one more little tip that I figured out.  As I was hanging my garland, I thought I had made a MAJOR error.  Some of the snowflakes were tipping, and not laying the way I wanted them to.  I could have CRIED at that point.  But I found a solution (completely by accident.)  Use some small pieces of poster putty, and stick them to the bottom of the backside on each snowflake.  It works like a little weight on each one, to hold it straight up and down.  Adjust as necessary, with more or less putty until they hang correctly. PHEW! 
Have a sparkly, festive season, filled with glitter and glue! (After all, isn't that what the holidays are about?!)
snowflake tutorial by laura williams, for acherryontop.com

Suggested Products:
maya road snowflakes a cherry on top  adirondack Pearl Metallic Acrylic Paint a cherry on top Crystal Ice Stickles Glitter Glue a cherry on top    Crystal 8mm Round Beads jolees a cherry on top

Clean and Simple Spooky Halloween!


I don't usually send out Halloween cards - yet for some silly reason, I LOVE to MAKE Halloween cards! It's probably due to my LOVE for all things PUMPKIN. Or maybe it's my love of black-white-and-any-bright-color. 
So my goal this year, is to send out Halloween cards - because I have quite a stash . . .like these three cards!
I used the Close To My Heart's Perfect Fit - Halloween set on all three of these cards, and a circle punch.  This set coordinates with CTMH's Cricut Art Philosophy cartridge, but a circle punch or two will work too!
I used the Silver Shimmer Trim on this first card. It is SUCH fun and really easy to use. It's self adhesive, and you just lay it right on. 

On these last two cards I used some jewels from my stash.
(I think they are from Bazzill) although some accessories from the Haunted Assortment would have been even more perfect!


Have a clean and simple, SPOOKY Halloween! 
Laura,

Friday, October 5, 2012

Oct. 31 (a fall card and a fall recipe)


Halloween is coming! 
We're looking forward to fall leaves, cool weather, and tasty treats this year on Halloween, because we'll be celebrating in the mountains, instead of sweaty Florida! Hooray! 
I like all things pumpkin, and cute on Halloween. So this swirly, cheery Halloween card is very ME!

(all supplies from Close To My Heart, except ribbon and jewels) 

Speaking of pumpkin, want to see one of my favorite fall pumpkin recipes?

Baked pumpkin oatmeal . . .totally delish, and you can make it on Sunday night and eat it all week long for breakfast! 

Baked Pumpkin Oatmeal
  • 3 cups quick cooking oats
  • ½ cup brown sugar
  • 1 cup milk
  • 2 tablespoons butter
  • 2 eggs
  • 2 teaspoons baking powder
  • ¾ teaspoon salt
  • teaspoons vanilla
  • ½ teaspoon cinnamon
  • ¾ cup canned pumpkin
  • ¼ cup brown sugar (for the top)
In a large bowl mix together all ingredients except the ¼ cup brown sugar for the top.
Spread into a greased 9×13 pan.
Sprinkle remaining ¼ cup brown sugar on top.
Bake at 350 for 20 minutes.
Serve with milk and enjoy!
You can find this recipe, plus lots more pumpkin recipes that I love, on my recipe boards on Pinterest! 
Have a beautiful fall day!
xoxo

Tuesday, October 2, 2012

The {Stamps} of Life new for November!

Bzzzz bzzzzz, did you see what's new at The {Stamps} of Life!? Bumblebees!!! Okay, tell me that this little guy isn't just ADORABLE! I never knew I loved bees so much! The sentiments are adorable, and there are cute tiny little bees as well as the big bee. Be sure to visit the TSOL store to see all the new stamps and dies available!


inspired by my blog (CFC72)


I decided to take some time this week and do some cards for no particular reason, other than for the FUN of it. (Rather than for assignments, or "work" .  . . although sometimes assignments and work can be FUN too!)
I thought I'd hop in and do this week's challenge at Cas-ual Fridays.  It's a really fun one and sounded super simple to me! The challenge is:
CFC72:  Create a project inspired by your blog header
We can't wait to check out your blogs! 
Be sure to share the love, and visit your neighbors in the gallery this week :)

I LOVE my blog banner.  It's very. . .ME. Clean and simple, cheery and bright.  All the things I love! It's not too hard to see how I was inspired, because I pretty much just duplicated my banner right there on the card.  I used my sweet friend, Tami Mayberry's stamp set, Perfect Pennants, from Gina K Designs

If you'd like to join in on this week's challenge, head over to the Cas-ual Fridays blog and check it out!
Have a great day!!
xoxo